
How To Update Your Local INR Bank Details
Whether you’re a small business, consultant or professional, getting paid is critical. With Payoneer, funds are transferred quickly and securely from companies worldwide to your local bank account in INR at low cost. Read on for a step-by-step guide to updating your personal bank account details with Payoneer.
To Update Your Bank Details
In compliance with local regulation in India, payments are transferred automatically from your Payoneer account to your local bank account within 24 hours. To keep your funds secure, we can allow only one bank account to be linked to your Payoneer account at a time. To update your bank details, follow these step-by-step instructions:
- Sign in to your Payoneer account.
2. Under Help, select Support Center
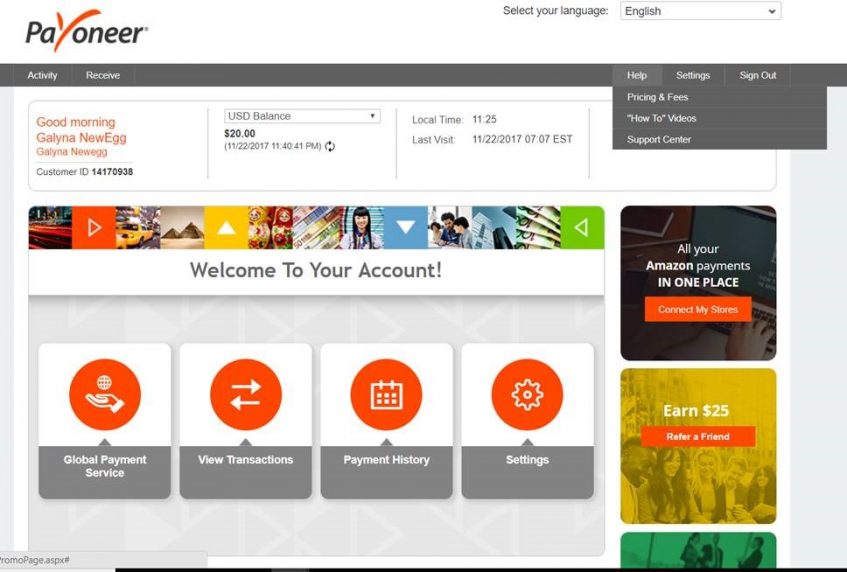

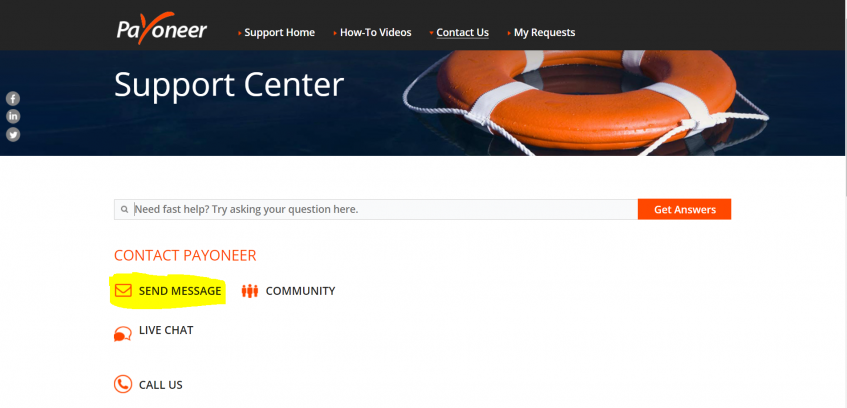
- Click on SEND MESSAGE.

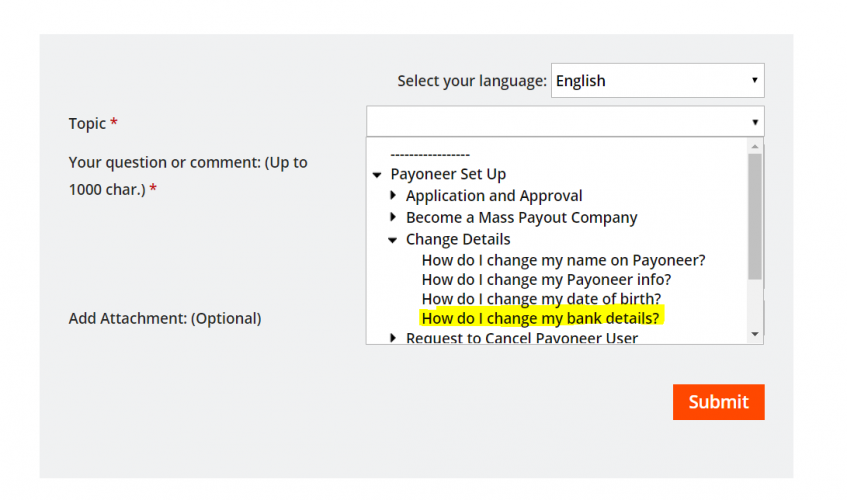
- In the Topic menu, select Payoneer Set Up-> Change Details -> How do I change my bank details?

- In the question/comment field, provide the following details:
- Reason for changing your bank details
- Date of birth
- Your Payoneer username (usually this is the email address associated with your account)
- Last 4 digits of the current bank account number
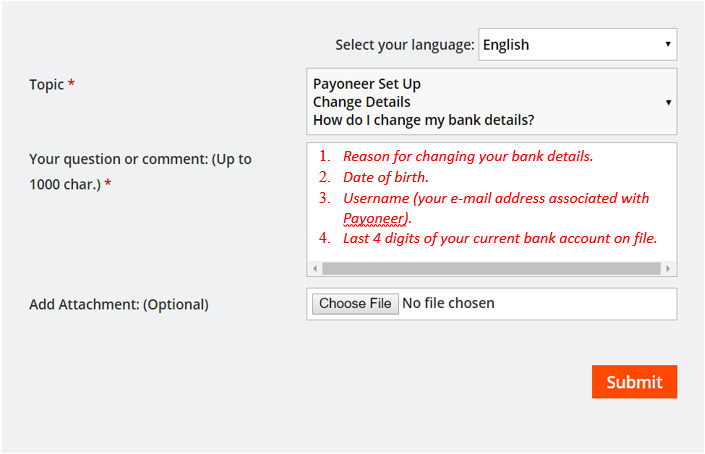

6. Next, to Add Attachment, click on Choose File and attach a copy of a voided check with your new bank details.
If you are not able to provide a voided check, we can also accept an official bank document confirming the complete bank account details.
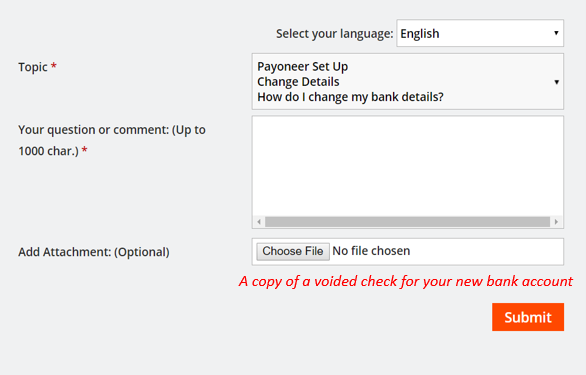

7. Click on Submit.
You should be able to see the updated bank account details in your account within 24 hours. A member of Payoneer’s Customer Care team will contact you in case of any concertns.
To View Your Bank Account
1. Sign in to your Payoneer account.
2. Under Settings, select Bank Accounts.
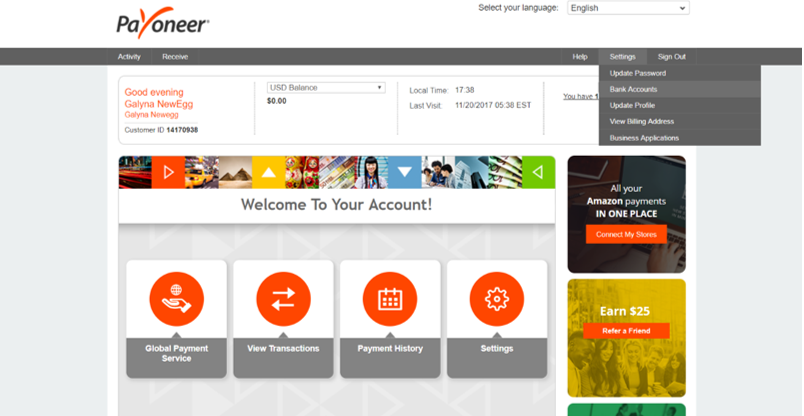

- View your bank account.
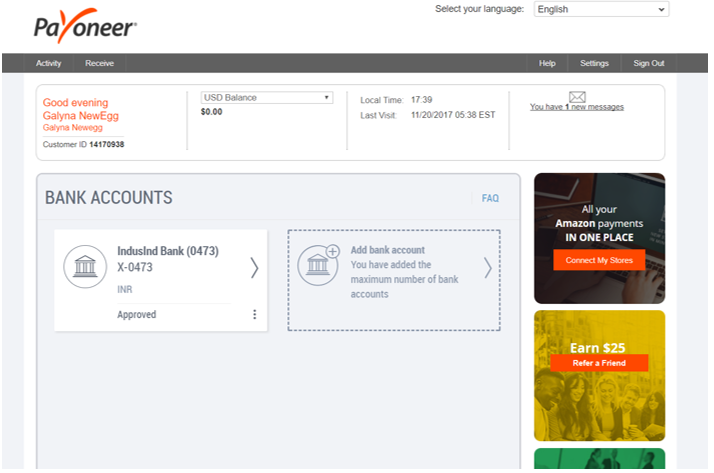

Once you’re ready, exit securely by clicking Sign Out on the menu bar.


