


5 Must-Do Tips to Improve Your Product Photos
All it takes for a consumer to decide whether or not they want to purchase your product is a split second. The deciding factor in whether they click or move along is usually due to your product’s image.
These images are the closest a consumer can come to holding your product in their hands. Your photos must convey not only physical traits like color and size, but also create an emotional appeal — something that speaks to a deep-seated desire like aspiration, comfort, or ease.
In order to help you scale your eCommerce business and improve the way you showcase your product images, we received expert advice from those in the industry.
“For most consumers, product photos leave an important impression. They impact how your shoppers perceive your product, and whether they push the Buy button or the Back button. When your product images are stunning, you’ll almost always see an uptick in your online sales. It’s all about the details – lighting, interesting arrangements, graphical call-outs, and technical specs.”
– Kim Kohatsu, CMO at PickFu, a software solution that helps eCommerce entrepreneurs optimize their online business.
Follow these five tips to take your product (and sales!) to the next level.
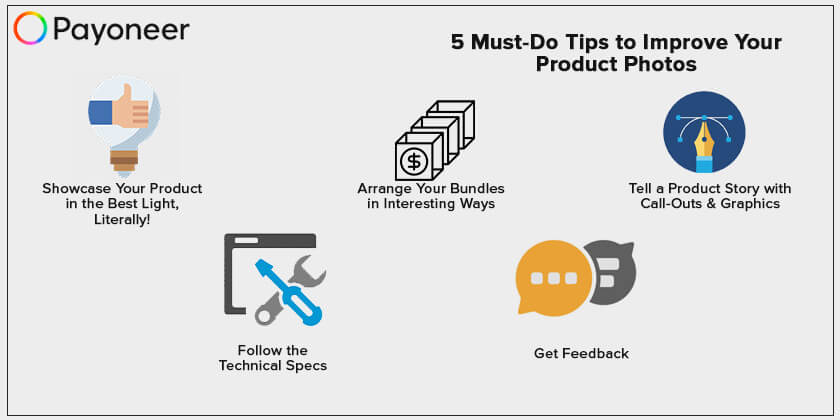
1. Showcase Your Product in the Best Light, Literally!
Lighting makes a huge impact on the quality of your photos, which has a major impact on customer perceptions of your product. Think about this: the word photography comes from the Greek for “to paint with light”.
If you’re not hiring a professional, you can still create the effect of a big-budget studio when you DIY. Here’s how:
- Never use the built-in flash of your camera. Seriously. The key to good lighting is to use at least two lights and place them on each side of your product. Experiment with different setups to see how the light makes the image more dynamic. For instance, if your product has a shiny surface, shift the lights or your camera angle to avoid any glare.
- Don’t use a cellphone to shoot products. Cellphones generally have a wide-angle lens that will distort the view of your product.
- Invest in an inexpensive light kit. They generally run about $100. Or just grab the lamps off your desk and nightstand and play around with them and then set the white balance on your camera to Auto.
2. Arrange Your Bundles in Interesting Ways
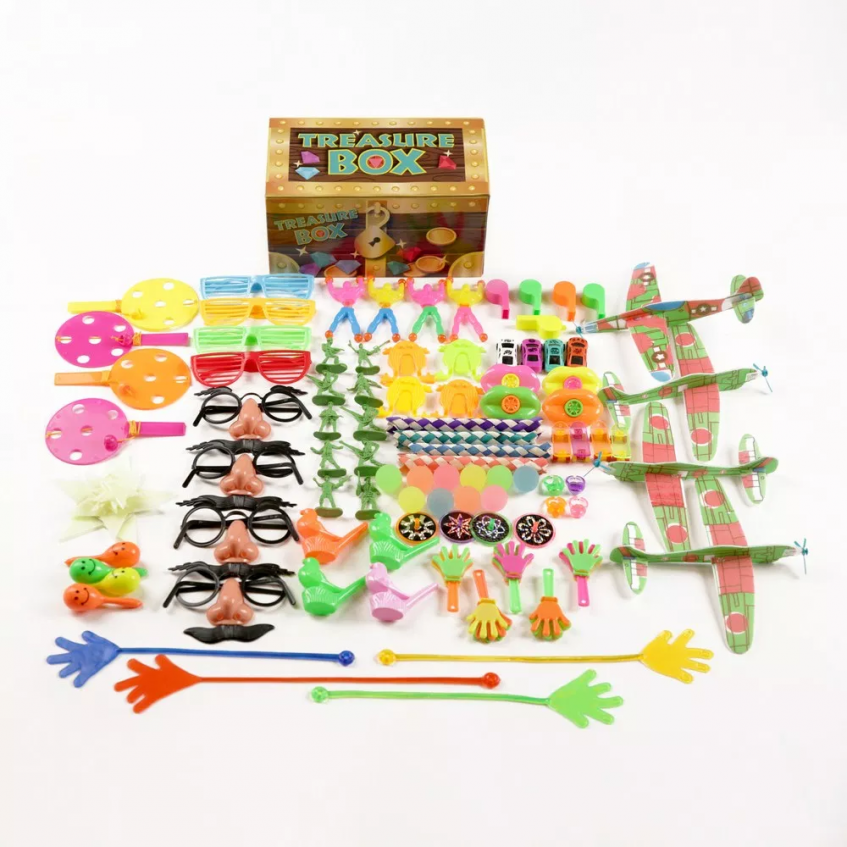
If your product is a multi-pack or has several component parts, show shoppers all of them. At least one photo in your gallery should show everything included in the package, and it should show the package, too. Arrange the pieces in as many ways you can think of to give yourself lots of options.
- Try staging the components in neat rows, by size, with and without the packaging, and any other ways you can think of.
- Don’t always shoot at eye level. Make the product more dramatic by placing the camera below the product to give it a heroic flair.
- Don’t settle on just one arrangement. A different layout can dramatically affect how shoppers react.
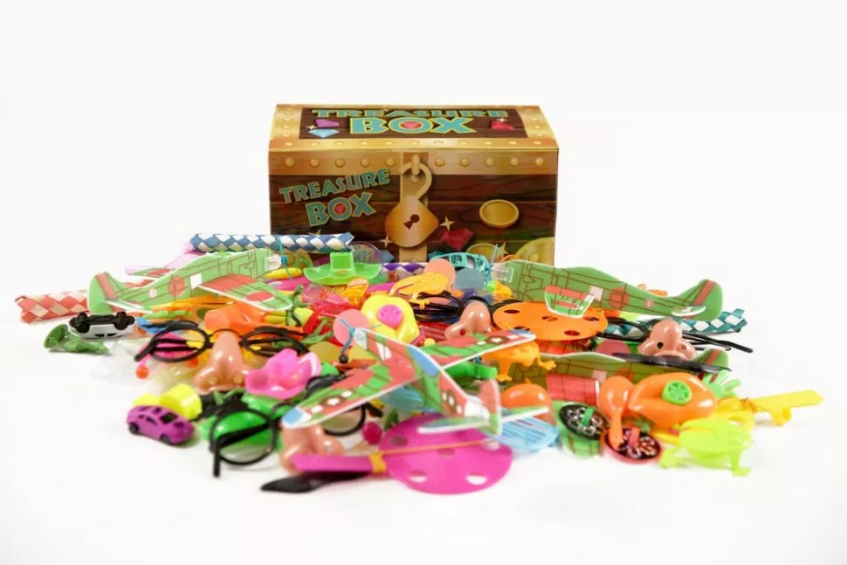
Check out the treasure box example below. In this first arrangement, the toys are piled in a bunch to show the variety of what’s inside. In the second, they’re neatly laid out in rows. Each photo makes you feel differently about the product, doesn’t it?
3. Tell a Product Story with Call-Outs & Graphics
Badges, icons, text, and graphic treatments can make your images look more professional. Use the order of your photo gallery to tell a product story. For example, take your five most important bullet points and reinforce them in five photos.
- Emphasize important details and key features, such as “5-pack,” “Made in the USA,” “100% Organic,” or “Works with Alexa.” Include ideal uses for the product. Show accolades or third-party endorsements.
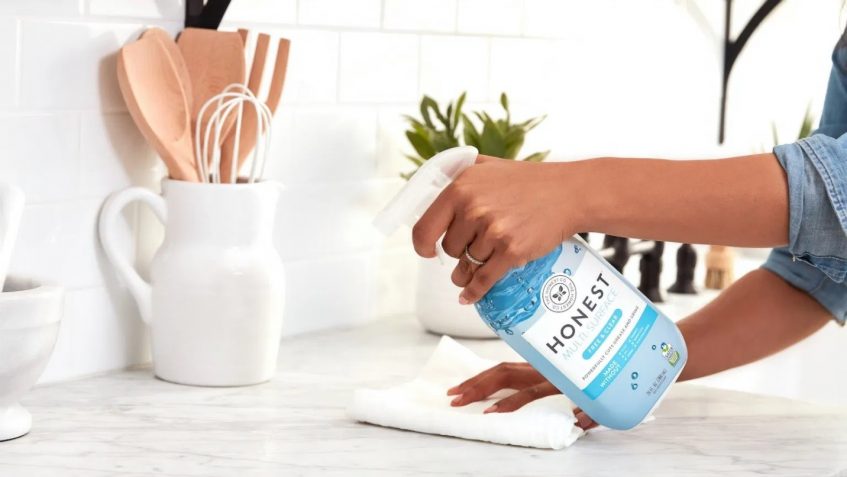
- Enhance your photos with creative graphic elements, or “eye candy.” For example, if your product is orange-scented, place fresh orange slices next to your product. If your product is waterproof, photoshop a water splash behind it, like the example shown.
- Photo editing is crucial but be sure to do it well. A badly photoshopped image can make your product look amateurish and untrustworthy. If you’re not comfortable doing it yourself, it’s best to hire someone.
4. Follow the Technical Specs
Shoot your photos in high resolution, even if that means large original files. Remember, you can always compress images down, but you can’t scale a photo’s quality up after you take the picture. Amazon requires photos to be at least 1,000 pixels wide, but if yours is at least 2,000 pixels wide, the shopper will be able to zoom in and see the details up close. Zooming is especially important for fabric or textured products and to see close-up details like stitching. Use a consistent aspect ratio across all of your photos.
- Make sure your photos accurately reflect the color of your product. Online, most images render in RGB. So, if you upload images in CMYK, it might distort the colors. If your product arrives in a different color than a shopper expected, you can bet on less-than-stellar reviews or angry complaints.
- Fill the frame. Amazon requires that the product should fill 85% of the frame. The bigger and more clearly you can show your product, the more successful your listing tends to be. Crop out extraneous white space. In a competitive marketplace, take advantage of every pixel of real estate you’re given.
- Use every available image slot. If you’re allowed up to six images, be sure to fill all six. Include different types of photos including detailed close-ups, infographics, and lifestyle images.
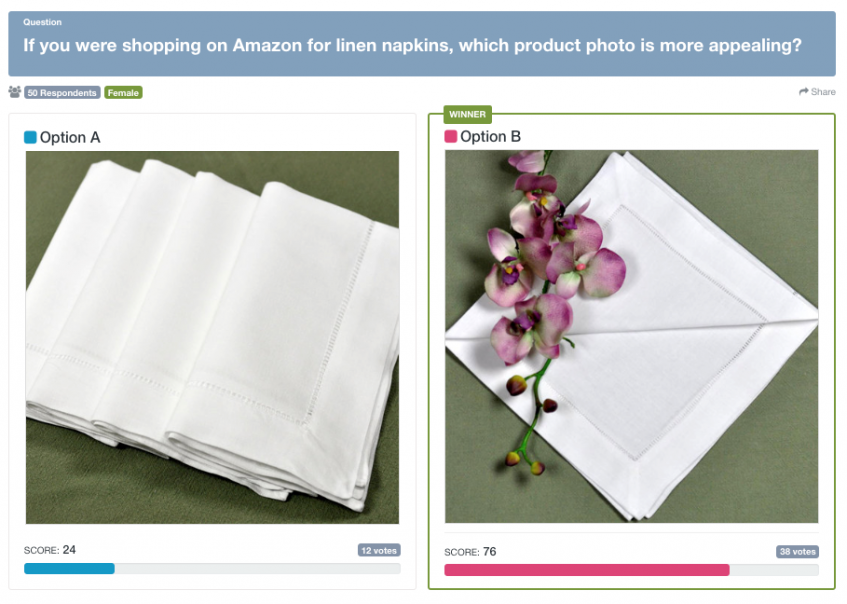
5. Get Feedback
The harshest feedback you can get on your main image is a low click-through rate. However, there is an easy way to ensure that doesn’t happen when you take advantage of market research. Using an eCommerce optimization tool can help you be confident that shoppers are drawn to your product images, all in a matter of minutes.
Putting it All Together
Ready to take your eCommerce business to the next level? Before you go to market with new images, make sure to collect ever-important consumer feedback. The insights you get back will shape your product story and marketing so you can succeed online.