


Registering for a Payoneer Account to Manage Your eBay Payouts
Please note: This partnership is only available in specific countries.
Payoneer’s partnership with eBay enables sellers from all over the world to streamline their eBay payouts, allowing them to effectively manage their global eBay transactions using our comprehensive payments solution. In this step-by-step guide, we’ll outline how to sync your eBay account with Payoneer, register for a Payoneer account and ensure your onboarding process is as smooth as possible.
Step 1: Connect Your eBay Account with Payoneer
The first step, after receiving your invitation to start managing your eBay payouts with Payoneer, is to connect your eBay account with Payoneer and create a Payoneer account. Click here if you already have a Payoneer account.
If you have multiple eBay stores, please consult our registration requirements for additional info.
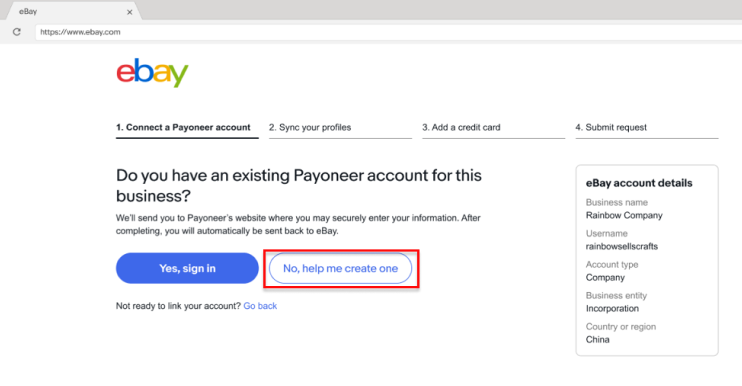
1. After signing into your eBay account, you’ll be prompted to create a Payoneer account by clicking the “No, help me create one” button:
2. After clicking the button, you’ll be taken to the page below to sign up for an account. Select “Individual” or “Company” depending on the account you’d like to set up.
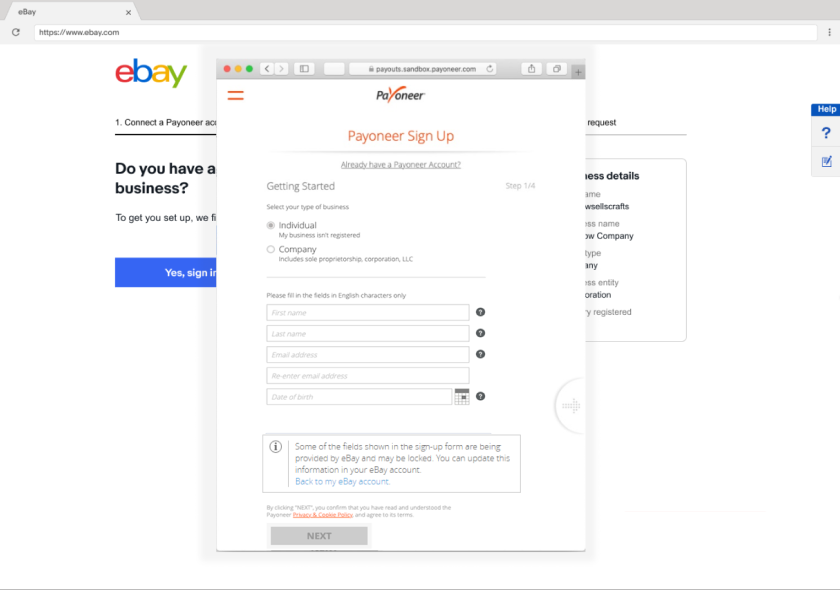
Whether you’re an individual or a company, please make sure that all registration details match you or your company’s verification documents. If you are selling in the EU or UK, your name must be written in English characters and match the name on your VAT certificate, as per eBay’s European VAT requirements. When complete, click “Next”.
3. Enter your authorized representative’s details, including their name, date of birth and ID number. Note that you must provide the details of your authorized representative only and not those of a different employee in your company.
4. Create a password and choose a security question. Please note your password, as you’ll need it to sign into your Payoneer account.
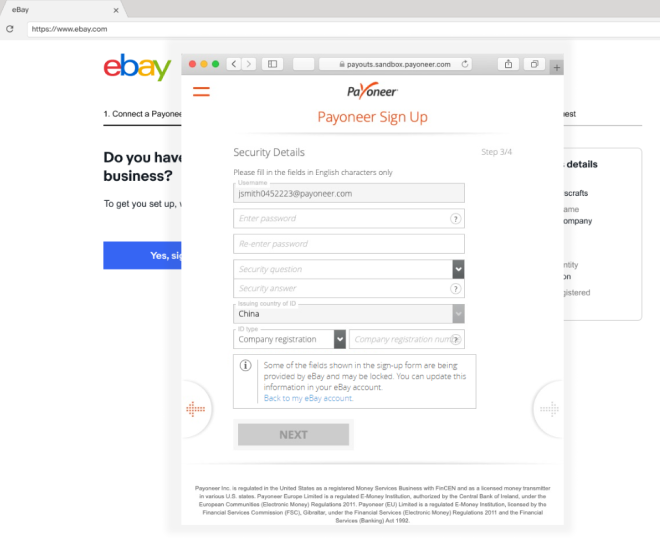
5. Enter your bank account information. You must list the bank account belonging to either your company or authorized representative to ensure that your payouts are correctly processed.

Connecting Your eBay Account with An Existing Payoneer Account
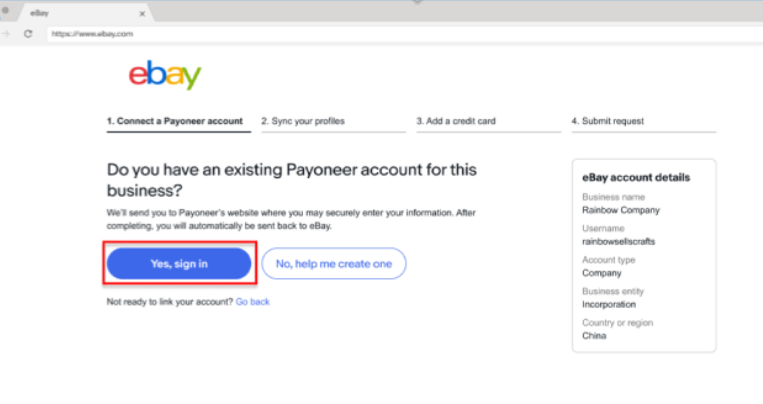
1. After signing into your eBay account, you’ll be prompted to either sign into your Payoneer account or create a new account. Click the “Yes, sign in” button.
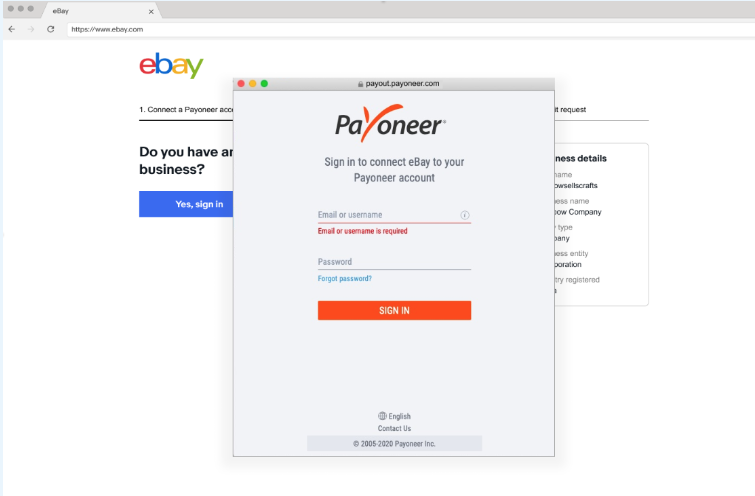
2. You’ll need to sign in to connect eBay to your Payoneer account.
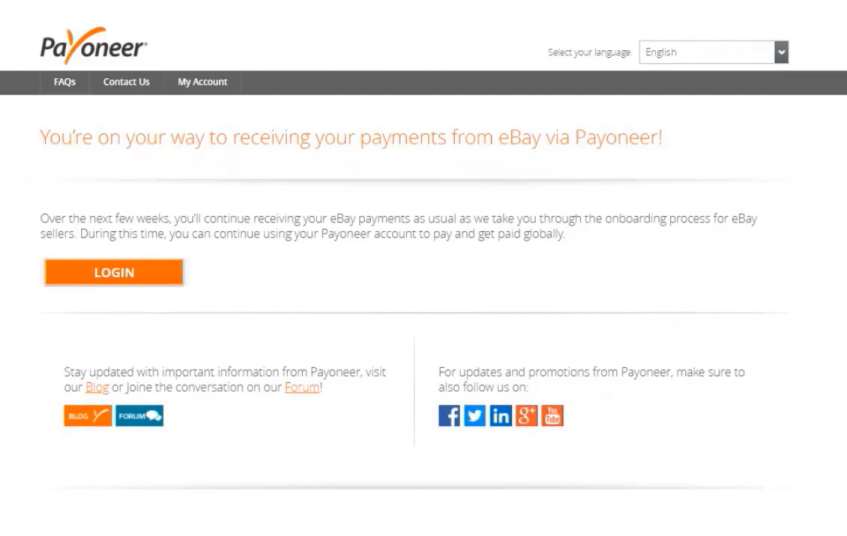
3. You’ll then see a confirmation message confirming that you’re on your way to receiving your eBay payments via Payoneer.
Step 2: Sync Your eBay and Payoneer Accounts
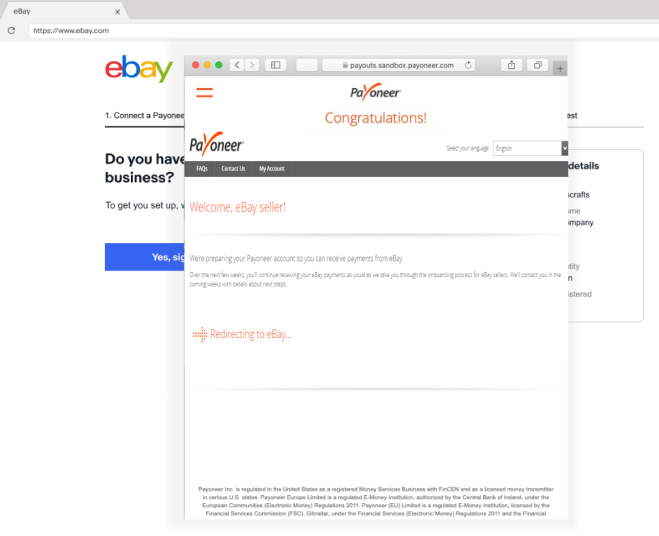
1. After registering with Payoneer or connecting your existing Payoneer account, the following screen will pop up and you’ll be automatically redirected to eBay:
2. You’ll then need to sync your Payoneer and eBay profiles:
Note: As part of eBay managing your payments, when onboarding to Payoneer, eBay will sync your eBay entity details to match those in your Payoneer account.

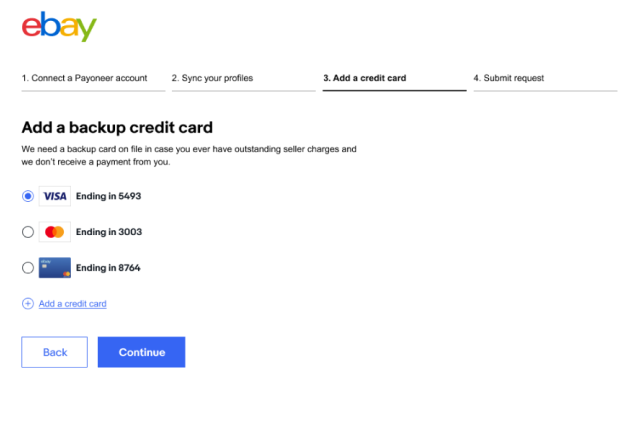
3. To register to eBay managed payments, you’ll also need to add a backup credit card to your account:
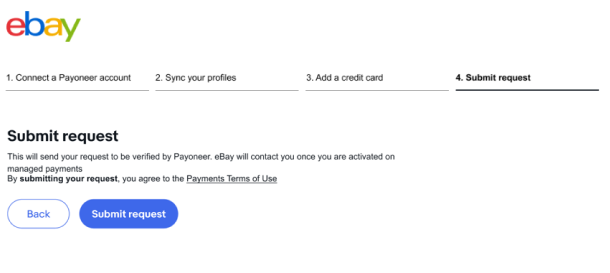
4. Then, submit your request to complete the registration process:
Step 3: Set Up Your Payoneer Account
The process for setting up your Payoneer account to start receiving your eBay payouts is detailed in the steps below. If you have multiple eBay accounts registered under the same business entity on eBay, it’s recommended to connect them to the same Payoneer account. Learn about specific use cases related to multiple eBay accounts in our registration requirements. Please note that you’ll continue to receive your eBay payouts via PayPal until your account setup is complete.
Getting Started
1. Shortly after submitting your request to eBay, you’ll receive an email from Payoneer confirming the receipt of your application.
Submitting Required Documents and Information
2. Several weeks after connecting your account, you’ll be asked to provide additional information as part of onboarding to eBay to verify your identity and business. A full list of documents can be found here. It is recommended to start compiling these documents now to ensure a smooth onboarding.
3. Once you receive an email requesting your documents, you’ll need to upload them through Payoneer’s Verification Center, which can be found under the “Settings” tab in your Payoneer account. Note that you may need to submit additional information once your documents have been reviewed.

4. After your information is verified and approved, we will inform eBay that your account is ready. eBay will notify you when you can expect to receive your payouts to your Payoneer account. This may take several weeks.