


How to send or schedule payments to your recipient’s bank account
At Payoneer, our focus is always on helping you pay and get paid quicker and easier than ever – wherever your team is based.
We understand that speed and certainty are crucial for any business. That’s why we make it easy to pay your contractors, employees, or suppliers straight to their bank account. By sending or scheduling payments directly to your recipient’s bank account, you get complete control over all your outgoing payments.
This capability has long been enjoyed by Payoneer users because:
- Paying international contractors, suppliers, and employees is made simple, quick, and secure. In just a few clicks, you can send payments globally from the funds held in your account.
- Scheduling payments means you’ll never miss or forget another payment. Whenever it’s convenient for you, simply schedule all your outgoing payments and free yourself from having to sign in on the specific payment dates.
- Batch payments allow you to send up to 1,000 payments worldwide at the click of a button, saving you time and energy when paying recurring invoices or making multiple payments at the same time.*
To start paying your contractors, suppliers, and employees directly to their bank accounts, simply follow these steps:
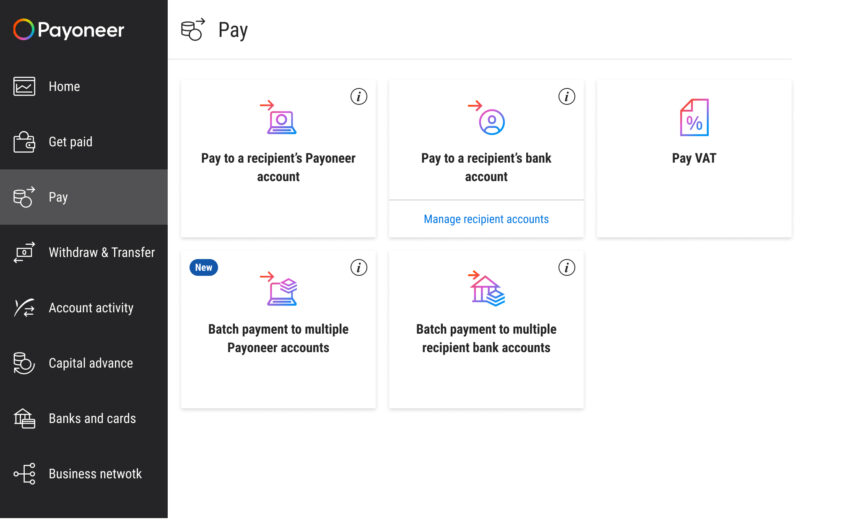
- Click Pay in the main menu and then select Pay to a recipient’s bank account.
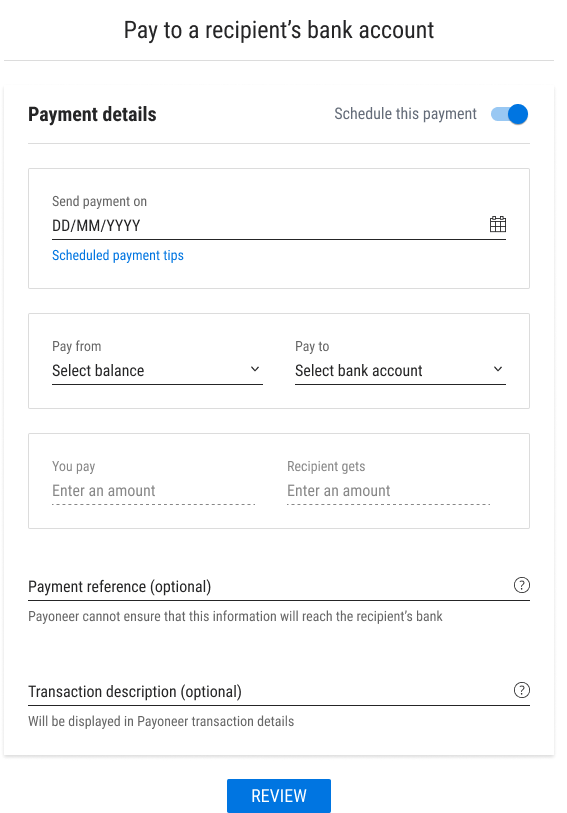
- If you want to schedule your payment, toggle the slider and input your chosen payment date. For immediate payments, simply add your payment details (select the balance you want to use, choose the bank account you want to transfer funds to, enter the amount you want to transfer, and add an optional reference number and description). Once you’re ready to make your payment, click Review.
- Make a final check of the payment details and either click Pay or Schedule payment.
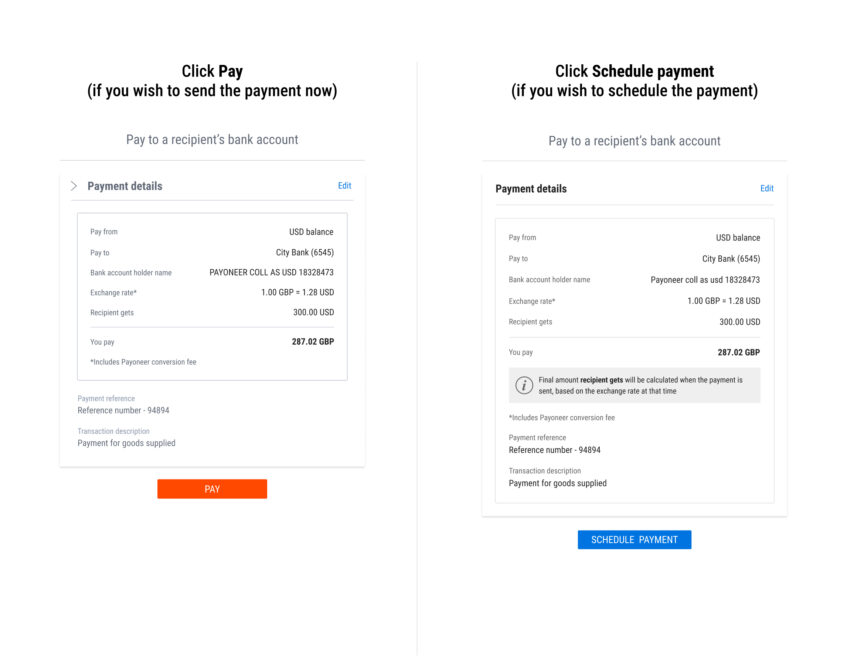
- You’ll then see a confirmation screen containing your transaction ID (and a payment date for any scheduled payments).
Sending or scheduling payments to your recipient’s bank account makes processing payments quick, easy, and gives you complete control over your outgoings. Try it today!
Note: If this is your first time paying to a recipient’s bank account, at step 2 click Add bank details and then select Add bank account. Once you’ve entered the necessary details, we’ll review your instruction and send it for bank approval – making your entire payment process speedy and smooth.